How to repair areas of corrosion & electrolysis

General boating discussion
mlt2819
Posts: 2
Joined: Tue Dec 24, 2019 11:52 am
4

How to repair areas of corrosion & electrolysis

#1

Post by mlt2819 »

Hi,

I have a 28ft sailboat (40 years old) and it has a few sections with pitting type corrosion and (I think) electrolysis. It's my first boat and I've been reading as much as I can about how to repair it, but I'm keen to hear from others here about their first-hand experience/advice on the best way to repair these areas. Overall, the boat seems to be in good condition and it was surveyed too (but clearly some of these areas were not looked at closely enough...) Attached below are three shots of the main problem areas. If you have any input on how to tackle this, it would be super helpful! Thanks.

Below: These pits are 1/25 - 3/32" (in general) and there are other areas aside from this. Should I sand the pits away completely (leaving behind a concave area of bare aluminum) or should I use an aluminum oxide tipped Dremel bit and sand only inside the pit itself?
IMG_3601.JPG
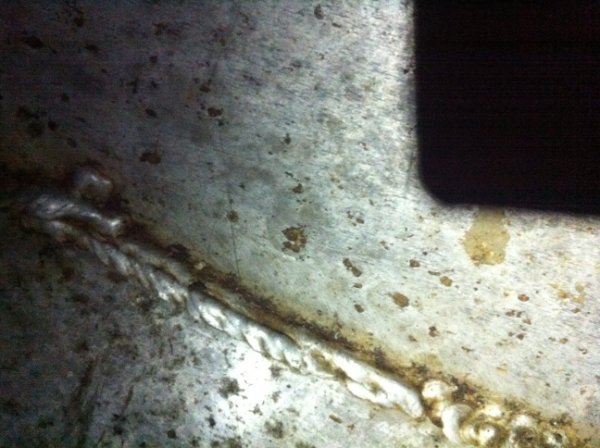
IMG_3601.JPG (65.77 KiB) Viewed 10340 times
Below: This area is the worst-looking of all! This area was underneath where the 2 x 12V batteries are stored. The bottom plate - running the length of the boat - is roughly a 1/4" thick and everything else is 3/16". When I removed the batteries, I found the area had water (I didn't check if it was salt or freshwater) and worst of all, the previous owner had dropped a Stanley knife. I have no idea how long it was sitting in that electrolytic broth :| I'm guessing that I need to sand the whole panel to clean aluminum or could I tackle each corroded blotch one by one?
IMG_4459.JPG
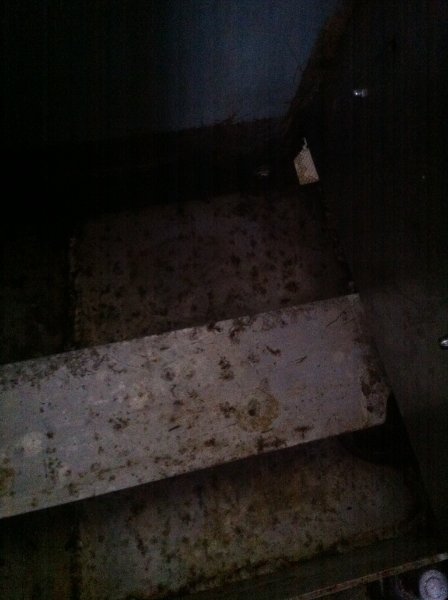
IMG_4459.JPG (35.59 KiB) Viewed 10340 times
Below: This pit is 1/16" deep (on 3/16" plate) and is the deepest one I've come across. No doubt it was caused by the uninsulated steel screw (horrible!!!). I've since removed the screw and splashed it with a bit of Alumabrite to re-passivate it. I assume I need to completely sand out this entire area so it's down to clean plate and totally smooth? At the minute, I'd rather avoid having to drill this area out and have someone fill weld it/patch it, mainly because in the next few years I plan to haul it out, strip it down to bare aluminum and repaint the boat (this was done 8-9 years ago by the previous owner) - I'm working on the assumption that when it's bare, I'll probably find other spots that need doing and I would rather have it all done properly in one go.
IMG_4604.JPG
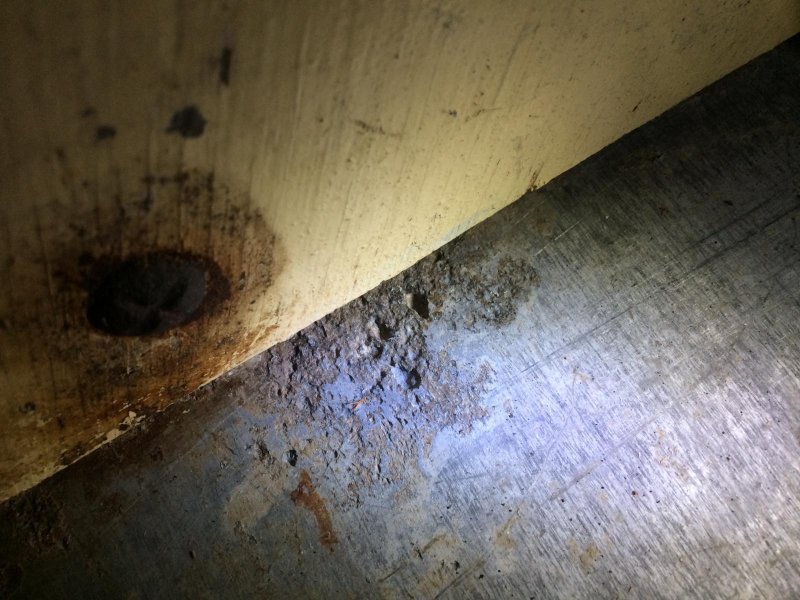
IMG_4604.JPG (99.17 KiB) Viewed 10340 times
Once I'm done with treating these areas on the inside, I plan to leave it unpainted, but I will give it a protective coating with Alumetron (or something similar. Does that sounds like an OK course of action?

If you've read this far, thanks very much!
Chaps
Donator '09
Posts: 2246
Joined: Sun Jan 13, 2008 12:19 am
16
Location: Seattle, WA

Re: How to repair areas of corrosion & electrolysis

#2

Post by Chaps »

Well electrolysis is far to serious a malady to describe anything you have got going there. After 40 years not surprising to have a few spots of corrosion from some ownership issues. Any of these areas actual below waterline hull plating or just inner structure?
1987 24' LaConner pilothouse workboat, 225 Suzuki
Image
please view and like: https://www.facebook.com/bottompainting/
mlt2819
Posts: 2
Joined: Tue Dec 24, 2019 11:52 am
4

Re: How to repair areas of corrosion & electrolysis

#3

Post by mlt2819 »

Chaps wrote: Sun Dec 29, 2019 3:21 am Well electrolysis is far to serious a malady to describe anything you have got going there. After 40 years not surprising to have a few spots of corrosion from some ownership issues. Any of these areas actual below waterline hull plating or just inner structure?
Hi Chaps, all of the problem areas are on hull plates below the waterline (on the inside of the boat). Thanks
kmorin
Donator 08, 09, 10, 11, 12, 13, 14, 15, 16, 17, 18, 19, 20, 21, 22, 23, 24
Posts: 1743
Joined: Mon Aug 18, 2008 1:37 am
15
Location: Kenai, Alaska

Re: How to repair areas of corrosion & electrolysis

#4

Post by kmorin »

mlt, some remarks in general about the photos in your blo-boat hull.

First, since the first few images are kind of dark- I'll be speculating more than replying from a brighter contrast and higher illumination image- so probably need some salt to go with my remarks.

The interior surfaces don't look as though the hull was etched during or after the build so the majority pitting of what's shown was propagated by mill scale being left on the aluminum. Mill scale is retains water vapor- that vapor condenses into droplets, shifts pH when the thin film inside the mill scale De-aerates and becomes mildly acidic.

Once the liquid is pH shifted it will attack oxide and pitting begins. Acid etching a new build radically reduces this and eliminates this source of corrosion.

Of note is one photo that shows a bit of paneling/"ceiling" of unknown composite sheet goods- fastened with a steel/iron/galvanically different and rusted truss head screw (!!!) below this is some severe pitting with the dew/condensate/ambient condensed moisture has rusted the screw head- then the iron ion laden run-off has pooled on the aluminum and the naturally resulting galvanic cell has used aluminum molecules to fuel a battery- consuming whatever surface (hull/structural frame/stringer??) is shown in the photo.

There are other instances in the darker photos that aren't as clear cut, but all added together they imply the construction was substandard regarding surface prep. To correct or 'save' the boat's hull from further deterioration:

#1 remove 100% of all finish/ceiling/none-aluminum items from the hull
#2 acid etch the entire interior and
#3 locate and excavate the extreme pitting sites using carbide cutters to clean out to bare metal.
#4 plan the weld-in replacement panels, patches, stiffeners, pit filler welds and perform the repairs.
#5 plan to have full air circulation in the hull even after the entire interior is replaced correctly leaving air passage ways for the boat to 'dry out'.
#6 add forced ventilation (fans, chimneys, heater elements) components to the rebuild so the boat will dry regardless of season or ambient temp/dew point at the berth or storage.
#7 alternatively, once repaired and cleaned with acid- add a full interior paint job beginning with acid etch/primer/base and top coats to all interior surfaces.

Avoid any fasteners that are bare steel, and look for SS screws for vertical surfaces, pre-drilling and even tapping as needed to avoid self-tapping truss head screws. Passivate all SS hardware, of all types, before installation. If possible bed all metal to aluminum hardware in 5200 or other glue that seals the interface from water intrusion. If zinc coated fasteners are available they'll have less galvanic difference than other fasteners/screws/bolts.

Some of your descriptions could be read one way- or the other- so I'm not avoiding trying to reply just not as clear as might be with lighter photos and a little bit more textual detail?

I'm not familiar with Alumetron, so can't remark about its use, benefits or gains to your project. Bare aluminum is usually fine if it can be cleaned of mill scale then kept drained dry from standing water films, especially where hardware is mounted and a film can be kept wet against the parent metal.

Be happy to offer more ideas, (errors from my sordid boat-building past), if they would be of any use?

Cheers,
Kevin Morin
Kenai, AK
kmorin
Post Reply Previous topicNext topic