
What do you guys do for maintenance? What am I missing? Ever had issues with the master cylinder cap leaking air leading to what I'm describing?? Very confused.....
Trailer Brakes
-
AlloyToy
- Donator '08 '09 '10
- Posts: 2433
- Joined: Wed Jan 09, 2008 8:55 am
- 16
- Your location: Mass
- Location: MA & RI
Trailer Brakes
Let's here the good and the bad  Seems that my brakes get "spongy" on me after a couple months. Then I purge them and they work fine for a bit. No leaks anywhere that I can see. No drips in the driveway. Every season I pull them apart, grease the pins, clean them and do a system check.
What do you guys do for maintenance? What am I missing? Ever had issues with the master cylinder cap leaking air leading to what I'm describing?? Very confused.....
What do you guys do for maintenance? What am I missing? Ever had issues with the master cylinder cap leaking air leading to what I'm describing?? Very confused.....

Re: Trailer Brakes
After you bleed the lines do you adjust the brakes?
-First fill the brake coupler master cylinder reservoir with DOT type 3 brake fluid.
-Next go to the brake cluster wheel cylinder farthest from the master cylinder in the tubing sequence.

-Open the barbed bleed valve on that wheel cylinder one turn, with a 3/8" open end wrench. Obtain a piece of 5/16" plastic hose about two feet long, push the piece of hose onto the bleed valve barb. Now you will need a clear container (BRAKE FLUID IS TOXIC. DISPOSE OF PROPERLY.) to use as your fluid receiving container. Set the fluid receiving container on top of the trailer fender or at some point above the wheel cylinder.
-Now route the plastic hose from the bleed valve barb to the fluid receiving container. NOTE: The fluid receiving container must be above the wheel cylinder so that any bubbles trapped in the bleed hose will flow up away from the wheel cylinder, not back towards it, which would be the case if the fluid receiving container were lower than the wheel cylinder.

Going back to the brake coupler, insert a large screw driver into the 1/2" dia hole in the coupler under the nut on the pushrod which extends out the front of the brake coupler housing. With your screw driver in place in this hole, you can use a back and forth motion to apply levered pressure directly to the master cylinder pushrod, by passing the coupler and shock damper mechanism.
-Remove the cap on the master cylinder reservoir and using small 1/2" forward and backward strokes on the screw driver, you will begin purging air from the piston portion of the master cylinder assembly. Bubbles will rise from a small hole in the bottom of the reservoir. As you continue with the 1/2" back and forth motion, bubbles will continue to rise until the piston portion of the cylinder is full of brake fluid. Only when you have No more bubbles rising in the master cylinder reservoir should you begin long strokes on the screw driver to pump fluid toward the wheel cylinders. NOTE: Once you have the piston portion of the master cylinder full of brake fluid and no more bubbles are rising in the reservoir, USE CAUTION. Do not look directly down into the reservoir while pumping the push rod. The brake fluid will squirt up with considerable force during the first part of each pump stroke. Don't let it hit you in the face. Set the filler cap on top to control this squirt.
-Now as you pump brake fluid into the system, you will begin to see it arrive at the fluid receiving container. (CAUTION - Never let the reservoir fall below 1/2 full during the bleeding process) If the fluid gets too low and sucks air down into the piston of the master cylinder, you must start over and the new air just sucked in and all brake fluid already in the system will need to be purged out. As you pump fluid thru the system, the bubbles you have been seeing in the fluid receiving container will cease. This indicates that you have completely filled the system with brake fluid.
-Now, with the bleed hose still on the bleed valve barb, close and tighten the bleed valve. Remove the hose and go to the wheel cylinder on the other side of the trailer and repeat the process. After completion of the bleeding process, refill the master cylinder reservoir and reinstall the reservoir fill cap and tighten.
-Next, apply pressure to the push rod and hold hard pressure on the screw driver for five or ten seconds. This will develop maximum hydraulic pressure on the system, and make it easy for you to see fluid if you have any leaks. After totally checking the system for leaks, you are now ready to adjust the brakes.
-First fill the brake coupler master cylinder reservoir with DOT type 3 brake fluid.
-Next go to the brake cluster wheel cylinder farthest from the master cylinder in the tubing sequence.
-Open the barbed bleed valve on that wheel cylinder one turn, with a 3/8" open end wrench. Obtain a piece of 5/16" plastic hose about two feet long, push the piece of hose onto the bleed valve barb. Now you will need a clear container (BRAKE FLUID IS TOXIC. DISPOSE OF PROPERLY.) to use as your fluid receiving container. Set the fluid receiving container on top of the trailer fender or at some point above the wheel cylinder.
-Now route the plastic hose from the bleed valve barb to the fluid receiving container. NOTE: The fluid receiving container must be above the wheel cylinder so that any bubbles trapped in the bleed hose will flow up away from the wheel cylinder, not back towards it, which would be the case if the fluid receiving container were lower than the wheel cylinder.
Going back to the brake coupler, insert a large screw driver into the 1/2" dia hole in the coupler under the nut on the pushrod which extends out the front of the brake coupler housing. With your screw driver in place in this hole, you can use a back and forth motion to apply levered pressure directly to the master cylinder pushrod, by passing the coupler and shock damper mechanism.
-Remove the cap on the master cylinder reservoir and using small 1/2" forward and backward strokes on the screw driver, you will begin purging air from the piston portion of the master cylinder assembly. Bubbles will rise from a small hole in the bottom of the reservoir. As you continue with the 1/2" back and forth motion, bubbles will continue to rise until the piston portion of the cylinder is full of brake fluid. Only when you have No more bubbles rising in the master cylinder reservoir should you begin long strokes on the screw driver to pump fluid toward the wheel cylinders. NOTE: Once you have the piston portion of the master cylinder full of brake fluid and no more bubbles are rising in the reservoir, USE CAUTION. Do not look directly down into the reservoir while pumping the push rod. The brake fluid will squirt up with considerable force during the first part of each pump stroke. Don't let it hit you in the face. Set the filler cap on top to control this squirt.
-Now as you pump brake fluid into the system, you will begin to see it arrive at the fluid receiving container. (CAUTION - Never let the reservoir fall below 1/2 full during the bleeding process) If the fluid gets too low and sucks air down into the piston of the master cylinder, you must start over and the new air just sucked in and all brake fluid already in the system will need to be purged out. As you pump fluid thru the system, the bubbles you have been seeing in the fluid receiving container will cease. This indicates that you have completely filled the system with brake fluid.
-Now, with the bleed hose still on the bleed valve barb, close and tighten the bleed valve. Remove the hose and go to the wheel cylinder on the other side of the trailer and repeat the process. After completion of the bleeding process, refill the master cylinder reservoir and reinstall the reservoir fill cap and tighten.
-Next, apply pressure to the push rod and hold hard pressure on the screw driver for five or ten seconds. This will develop maximum hydraulic pressure on the system, and make it easy for you to see fluid if you have any leaks. After totally checking the system for leaks, you are now ready to adjust the brakes.

-
AlloyToy
- Donator '08 '09 '10
- Posts: 2433
- Joined: Wed Jan 09, 2008 8:55 am
- 16
- Your location: Mass
- Location: MA & RI
Re: Trailer Brakes
Thanks for that info Jason. I'll give it a shot this weekend 
-
welder

- Site Admin
- Posts: 4668
- Joined: Thu Jan 03, 2008 11:51 pm
- 16
- Location: Whitesboro, Texas
- Contact:
Re: Trailer Brakes
I use a hand vacuum pump ,
Hook hose up to bleed valve , pull vacuum , crack open valve .
Be fore you loose vacuum tighten valve .
Fill Res. and repeat at other wheels .
Takes about 10 min.
This process Flushes and bleeds at the same time .
Hook hose up to bleed valve , pull vacuum , crack open valve .
Be fore you loose vacuum tighten valve .
Fill Res. and repeat at other wheels .
Takes about 10 min.
This process Flushes and bleeds at the same time .
Lester,
PacificV2325, Honda BF225
2386
PacificV2325, Honda BF225
2386
-
AlloyToy
- Donator '08 '09 '10
- Posts: 2433
- Joined: Wed Jan 09, 2008 8:55 am
- 16
- Your location: Mass
- Location: MA & RI
Re: Trailer Brakes
Les I have an upper and lower bleeder nipple. I've always bled the air from the top nipple.....do you know it that's correct?welder wrote:I use a hand vacuum pump ,
Hook hose up to bleed valve , pull vacuum , crack open valve .
Be fore you loose vacuum tighten valve .
Fill Res. and repeat at other wheels .
Takes about 10 min.
This process Flushes and bleeds at the same time .
-
welder
- Site Admin
- Posts: 4668
- Joined: Thu Jan 03, 2008 11:51 pm
- 16
- Location: Whitesboro, Texas
- Contact:
Re: Trailer Brakes
I use the top nipple as I think the air will be on the high side and of course it doesn't hurt to hit both to get the old/burnt fluid out.
Lester,
PacificV2325, Honda BF225
2386
PacificV2325, Honda BF225
2386

-
welder
- Site Admin
- Posts: 4668
- Joined: Thu Jan 03, 2008 11:51 pm
- 16
- Location: Whitesboro, Texas
- Contact:
Re: Trailer Brakes
That is REAL CLOSE , yes and it works like a charm .
Just be sure to use the jar as you NEVER want fluid going through the gun/pump.
Just be sure to use the jar as you NEVER want fluid going through the gun/pump.
Lester,
PacificV2325, Honda BF225
2386
PacificV2325, Honda BF225
2386
-
princyjoshu
- Posts: 2
- Joined: Mon Jul 05, 2010 7:12 am
- 13
- Your location: Los Angeles
Re: Trailer Brakes
I have one that really works good. But you need a compressor to operate it.
http://www.harborfreightusa.com/usa/ite ... egoryName=

There is no hand pumping.
I also use a special Blue brake fluid. That way you can see if it is flushed.
http://www.tirerack.com/brakes/accessor ... .jsp?ID=21
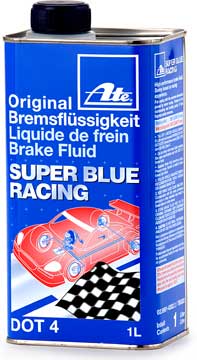
Then they make a Yellow fluid for the next time you flush it.
http://www.harborfreightusa.com/usa/ite ... egoryName=
There is no hand pumping.
I also use a special Blue brake fluid. That way you can see if it is flushed.
http://www.tirerack.com/brakes/accessor ... .jsp?ID=21
Then they make a Yellow fluid for the next time you flush it.
"Just 'cause it's New, doesn't mean it's worth a Damn."
-
AlloyToy
- Donator '08 '09 '10
- Posts: 2433
- Joined: Wed Jan 09, 2008 8:55 am
- 16
- Your location: Mass
- Location: MA & RI
Re: Trailer Brakes
Very nice warthog Thx for posting