Stuff I've been working on.

Mods and custom builds
User avatar
JETTYWOLF
Contributor/donator/Location Nazi
Posts: 6074
Joined: Sun Jan 06, 2008 9:11 pm
16
Your location: JACKSONVILLE FL USA
Location: Tree-hugger, USA...they call it FLA.

Re: Stuff I've been working on.

#26

Post by JETTYWOLF »

Good looking stuff. Anodized keeps the plastic boat people happy. And making them just bolt on makes them happy too.

Geez, I had holders just like that on both sides of the console on my old "non-alloy" boat. "Six per side." I would have loved to find customs I could actually afford back then.

Hard to see, but they're there.
MayCraft-2.gif
MayCraft-2.gif (112.28 KiB) Viewed 9897 times
Then had Pacific do the same deal on just one side of the console for me when I had my boat built. Floridians don't have cabins, we like mounted ones like you have there. (behind me...)
6-15-1.gif
6-15-1.gif (83.74 KiB) Viewed 9897 times
pjay9
Posts: 1137
Joined: Thu Mar 19, 2009 1:20 am
15
Your location: Tacoma, WA

Re: Stuff I've been working on.

#27

Post by pjay9 »

Nice looking work! How are you planning on finishing the inside of the tubes? I like the extra support leg especially if it will be used in trolling and sitting on a roof...if not trolling the leg may not be needed and the whole effort could stand more upright. The ideas just keep pouring in. Keep the posts coming. I was just standing at the back door looking at my boat sitting in the rain and thinking about what I need to do next...this is contagious!!! Capt PJ
2009 Raider 185 Pro Fisherman, 2005 90Yamaha, 2012 Yamaha9.9HT, 2008 EzLoader roller, 2004 Dodge TCD dually, 2005/2015 Lance1161
User avatar
aluminumdreamer
Donator '10
Posts: 369
Joined: Sat Apr 25, 2009 8:45 pm
15
Your location: Mid Coast Maine

Re: Stuff I've been working on.

#28

Post by aluminumdreamer »

I personally don't like the anodized, but like Jetty says it'll keep the plastic boat guys happy. It sucks to work with, it's not like you can use a ss brush to fix the scratches.

Thanks for the input guys, keep it coming and I'll keep updates of my progress coming until people get sick of seeing it.

Nate.
User avatar
goatram
Donator 08, 09, 10, 11, 12, 13, 14, 15, 16, 17, 18, 19
Posts: 1959
Joined: Wed Apr 09, 2008 11:53 pm
16
Your location: Stanwood, Wa
Location: Stanwood WA

Re: Stuff I've been working on.

#29

Post by goatram »

Nate;
White scotch Brite pads then appliy clear Alodine 1000 to the Buffed and Cleaned Aluminum pipe. 6063 al. Clean it with MEK wear gloves with both products. Alodine comes in three configurations for the Aircraft industry. 600 is used in the fuel cells. 1000 to bare Alloy and 1200 on painted the 1200 imparts a yellowish to gold color depending the strength and the length of time the alodine is left on before rinsing with water
John Risser aka goatram
33' RBW with twin 250 Hondas (Aliens)
2015 Ford F350 Dually
Master of R&D aka Ripoff and Duplicate
kmorin
Donator 08, 09, 10, 11, 12, 13, 14, 15, 16, 17, 18, 19, 20, 21, 22, 23, 24
Posts: 1751
Joined: Mon Aug 18, 2008 1:37 am
15
Your location: Kenai, AK
Location: Kenai, Alaska

TIG Techniques

#30

Post by kmorin »

Nate, its been a while since we've talked TIG but I've had another conversation so I'm posting the images here to see if they'd help your work as well?

Image

Image

Image

Image

These images are just some suggestions about getting a fixture built that helps steady the torch hand onto a bar/pipe clamp while you put passes on pipe. The T joint shown was in the other discussion but that joint is also in your work so I figured it would be OK to show here?

The blue pipe is 3" or so,tacked/bolted to the bench, and the smaller one above is a pinned collar- holes drilled up the smaller 2.5" pipe are not shown. This turns by a pipe wrench but you could add a hand wheel or some foot drive if you thought that important.

The furniture clamps form the infinite number of steady rests as needed by the pc to weld. I'd clamp this T to the tan work table with Visegrips at the 6:00 point where the pipe touches the table and of course- this for ideas only -not plans.

Image

Image

Image

There are two quadrants welded in this rough position, and the beginning is uphill as shown here. That can be adjusted if that weld is not a comfortable but any orientation - you'd work this joint in 1/4's .

Torch path is a smooth roll up the joint and the filler rod feed angle would drop for very high to almost flat or below -both hands/forearms or wrists can rest on the pipe and slide sideways as well as allowing the wrists to stay fixed while you roll them along the line of the forearm.

These suggestions are to help reduce free hand torch and filler work. There' s plenty to do without practicing to get free cup and free elbow as you are beginning and unless you're welding hours a day it takes some time to get your hands to act like you want them to behave.

Like your tack up fixture above - this will help you to do sub assembly welds of parts before they go onto the final larger assembly- and that too can be jigged to give more control and better positional access.

Image

Image

Image

here are the other two quadrants' clamp up and torch positions but these examples are just the ideas, I'm confident you'll have countless other uses and methods using a fixture of this type applied to your work.

Cheers,
Kevin Morin
kmorin
bassboy1
Posts: 35
Joined: Sat Dec 20, 2008 9:35 pm
15
Your location: Cartersville, Ga

Re: Stuff I've been working on.

#31

Post by bassboy1 »

Kevin,

That truly is good information. I can't thank you enough for much of the information on jigging and welding that you post on here and a few other sites. I don't post much, but I'm incessantly reading and re-reading your super informative posts.

Thanks!
User avatar
aluminumdreamer
Donator '10
Posts: 369
Joined: Sat Apr 25, 2009 8:45 pm
15
Your location: Mid Coast Maine

Re: Stuff I've been working on.

#32

Post by aluminumdreamer »

Thanks for that Kevin, I have been trying to come up with a good idea for some sort of device to hold what I'm working on. I could maybe put a receiver into my basement floor like I did with my bender, and build off of that.

Very informative, thank you.

Nate
kmorin
Donator 08, 09, 10, 11, 12, 13, 14, 15, 16, 17, 18, 19, 20, 21, 22, 23, 24
Posts: 1751
Joined: Mon Aug 18, 2008 1:37 am
15
Your location: Kenai, AK
Location: Kenai, Alaska

Re: Stuff I've been working on.

#33

Post by kmorin »

Glad those ideas help gentlemen, I'm sure you can see many more possibilities that arise with this jig?

Unless you intend to use the bender and weld positioner at the same time, Nate, you may as well build off that pedestal?
I'll try to post a few variations that I've used/do use for odd weld clamps, not sure with today's schedule when that will be.

If its at all possible for others to avoid the long learning time I spent becoming a reliable welder- its worth the time to make a few sketches and post them where folks might see them.

The saying "practice makes perfect" is only true if you're practicing the right thing- otherwise you're just reinforcing a bad habit.

Cheers,
Kevin Morin
kmorin
harry kosta
Posts: 17
Joined: Mon May 18, 2009 4:29 pm
14
Your location: sydney

Re: Stuff I've been working on.

#34

Post by harry kosta »

Just a question guys what is the correct way to weld anodized aluminum?
What tungsten colour and how to you keep the rest of the pipe from discoloring?
Thank you in advance

Harry Kosta
User avatar
aluminumdreamer
Donator '10
Posts: 369
Joined: Sat Apr 25, 2009 8:45 pm
15
Your location: Mid Coast Maine

Re: Stuff I've been working on.

#35

Post by aluminumdreamer »

I use green tungsten. The only place I get any kind of discoloration is at the weld. The welds end up looking more gray than when welding mill finish. Some guys will paint the welds with silver paint to make them look pretty like the rest of the metal. The only problem with that is if you need to do a repair around the area you painted, (especially if you use oil based paint) the oil will get into the aluminum and make repairs very difficult, and ugly.

I have heard of guys using a die grinder to remove the anodize from an area before welding to make the welding easier. I just burn through it, it would take a lot longer if I had to grind every joint of everything I made.

I am sure Kevin Morin could shed more light on this subject, so for now that is my two cents.

Nate
kmorin
Donator 08, 09, 10, 11, 12, 13, 14, 15, 16, 17, 18, 19, 20, 21, 22, 23, 24
Posts: 1751
Joined: Mon Aug 18, 2008 1:37 am
15
Your location: Kenai, AK
Location: Kenai, Alaska

Re: Stuff I've been working on.

#36

Post by kmorin »

Harry, Nate,
I'm not worth including in the discussion, I never weld anything with a coating, I don't work in 'pretty pipe' because none of the customers here want or use it, and we don't have much work in the TunaTower market here.

I have no experience in welding coated metal(s), I tend to clean everything down to bare metal or I won't light up on it.

Cheers,
kmorin
User avatar
aluminumdreamer
Donator '10
Posts: 369
Joined: Sat Apr 25, 2009 8:45 pm
15
Your location: Mid Coast Maine

Re: Stuff I've been working on.

#37

Post by aluminumdreamer »

I wish I never started using the stuff, but everyone seems to like shiny. You won't find any of it on my boat.

Nate
harry kosta
Posts: 17
Joined: Mon May 18, 2009 4:29 pm
14
Your location: sydney

Re: Stuff I've been working on.

#38

Post by harry kosta »

Alum-dreamer I have been using argon and a 2.4 white tip Tungsten My welds are looking Grey and tiny little bubbles also.
On mill material there is no problem.
We don't have green tip electrode in AUS ,I have also read that a 50/50 argon/ helium been used also,any thoughts on that.
My welder is set at 150 frequency and 60% balance.The machine is a CEA matrix200 (ITALIAN)

HarryKosta
welderbob
Donator ,15
Posts: 491
Joined: Sat Aug 02, 2008 8:14 am
15
Your location: Holbrook, NY
Location: Holbrook,NY
Contact:

Re: Stuff I've been working on.

#39

Post by welderbob »

Hate working with the shiny stuff. I don't think adding Helium will help. Helium helps when you are welding heavy material, although we weld 1" plate with straight argon (MIG)
Harry if your machine is an inverter style, a green tungsten (pure) wouldn't work.Working with anodized pipe is a whole another art form.
User avatar
aluminumdreamer
Donator '10
Posts: 369
Joined: Sat Apr 25, 2009 8:45 pm
15
Your location: Mid Coast Maine

Re: Stuff I've been working on.

#40

Post by aluminumdreamer »

Harry, I wish I had more info for you. I have only been welding aluminum for about 6 months, so I am no seasoned pro. My older Airco machine doesn't have any balance or freq adjustments. My welds come out ok, but nothing compared to when I weld mill finish. Like WelderBob said it is totally different.

I welded together a bunch of stuff last night, anodized, and mill finished. It looks like two different people did the work. Here are some pictures, see what I mean. :banghead:

Nate
Attachments
weld.jpg
weld.jpg (53.02 KiB) Viewed 9904 times
weld2.jpg
weld2.jpg (51.04 KiB) Viewed 9904 times
Rod Riggers pm if anyone is interested in a pair.
weld3.jpg (65.79 KiB) Viewed 9904 times
harry kosta
Posts: 17
Joined: Mon May 18, 2009 4:29 pm
14
Your location: sydney

Re: Stuff I've been working on.

#41

Post by harry kosta »

i see what you mean Kevin that's what I'm getting also. :banghead:
I have read that the tuna tower mobs are anodizing there material at half strength to allow easier penetration.
10 microns instead of 20 microns.
I have a rep who is looking for a another type of electrode that is a mixture of white tip and red tip.
I need to get my welds looking smik.

HarryKosta
User avatar
aluminumdreamer
Donator '10
Posts: 369
Joined: Sat Apr 25, 2009 8:45 pm
15
Your location: Mid Coast Maine

Re: Stuff I've been working on.

#42

Post by aluminumdreamer »

Here is a pot hauler davit I built for a customer. I delivered it this morning. It is built to the customers specs, 77 1/2" tall, with a 46" boom. The main structure is 1 1/2" sch 40 anodized pipe, and the support pipe is 1 1/4" sch 40. The customer requested a plate welded between the two pieces so he could mount a cleat, and an additional tab to hang a second block from. I also built 2 sets of mounting hardware, one set for each side of the boat.

I was pretty happy with the finished product, and the customer seemed to be also.
Attachments
davit.jpg
davit.jpg (82.74 KiB) Viewed 9793 times
davit2.jpg
davit2.jpg (120.27 KiB) Viewed 9793 times
AlloyToy
Donator '08 '09 '10
Posts: 2433
Joined: Wed Jan 09, 2008 8:55 am
16
Your location: Mass
Location: MA & RI

Re: Stuff I've been working on.

#43

Post by AlloyToy »

Nate, I like the looks of that :thumbsup: Nice job :thumbsup:
User avatar
21ftcc
Donator '09
Posts: 854
Joined: Thu Sep 04, 2008 4:19 pm
15
Your location: Worcester, MA

Re: Stuff I've been working on.

#44

Post by 21ftcc »

I can only guess what dad is getting the kids for xmas. :thumbsup:

I also like the hanging chair setup. :thumbsup: :thumbsup:
Image
kmorin
Donator 08, 09, 10, 11, 12, 13, 14, 15, 16, 17, 18, 19, 20, 21, 22, 23, 24
Posts: 1751
Joined: Mon Aug 18, 2008 1:37 am
15
Your location: Kenai, AK
Location: Kenai, Alaska

Re: Stuff I've been working on.

#45

Post by kmorin »

Nate,
what is that frame up the tree over the hammock? Have you been working so hard on the new products the wife has to hoist you with overhead rigging into the hammock?

nice davit, the pair of bends gives the design a nice 'tech' look that a single sweep or 45 bend wouldn't have, nice touch. The stubs between the two bends could be of 1/2" pipe and still retain the same stiffness of the entire structure, if you bevel the plate used between the two pipes, cleat mount (?), you can almost 'bury' the weld in that groove as it's formed to the pipe wall and reduce the apparent size of that plate to pipe edge weld. The pipe wall is 'falling away' or rounding out of the grooved area so the pipe side of the 'bevel' is not vertical/90 deg to the plate. With a bevel on the plate edge you'd have plenty of root face surface but no weld above the plate surface and still the weld would have face on both pipe wall and the full section of the plate.

Cheers,
Kevin Morin
kmorin
User avatar
aluminumdreamer
Donator '10
Posts: 369
Joined: Sat Apr 25, 2009 8:45 pm
15
Your location: Mid Coast Maine

Re: Stuff I've been working on.

#46

Post by aluminumdreamer »

The thing in the tree is for the purple hanging chair in the background. My wife has been after me for a while to hang the thing from something, but I just couldn't find a good branch. So, I built one!

Anyhow thanks for the kind words Kevin. Means alot coming from a pro. :thumbsup:

Nate
trouty
Posts: 71
Joined: Thu Jan 21, 2010 2:21 pm
14
Your location: Australia

Re: Stuff I've been working on.

#47

Post by trouty »

All our commercial lobster boats here use a "pot tipper" rather than the boom type pot hauler you have depicted above there.

Image
A lightweight recreational rock lobster trap tipper

Image
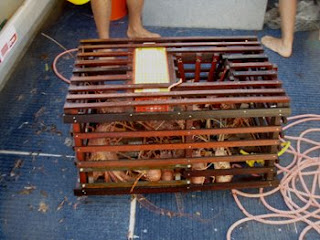
Typical timber slat type lobster trap.

Image
Here you see a commercial vessel with one trap sitting on the tipper - presumably ready to re set.

Less cumbersome, because most of it is outside the boat, leaving cockpit free when not in use & traveling between traps.

Rope is grappled & the bitter end with floats fed between the handles and over the blue roller - then the bitter end put around a 12V winch capstan. As the lobster trap is hauled up to the side of the boat with the winch, it sits flat side against the support frame and further hauling with the winch tilts the mechanism over the gunnel by its pivot point - the trap then slides down the tilt platform stopping at the two handles to the 2 uprights and sits there while you open the trap door and empty the catch into a tub on the deck below those two handles, once they are tipped inboard. You slide the two external bait container lids open on top of the trap to replenish bait, slide the lids closed, close the trap door - grab the now coiled rope and floats (buoys)(our winches are fitted with a auto rope coiler) and drive around looking at the echo sounder for where you wish to re set the trap.

When you wish to deploy the trap - you lift one of those two handles - the mechanism tilts outboard of the boat sliding the trap out away from the side of the boat back into the water - toss the coil of rope over the side followed by the bitter end with floats and your ready to go use a grapnel on a long line to get the next pair of trap floats & repeat process.

Its a similar system on commercial boats to what you see on deadliest catch with the alaska king crabs - except we use much smaller traps, & where the winch is hydraulic rather than 12 v electric and they set and haul on average about 160 traps a day on average

Effective... and also removable for storage if your not lobster fishing for the day.

I reckon it might be a lot quicker and less potential effect on vessel stability on a small boat than the pot hauler - due to lower leverage height above meta-center with the pivot point slightly inboard and located at gunnel height rather than out at the end of the boom - well outboard of the hull when pivoted on the depicted pot hauler.

I guess it all depends how many traps a day you haul, here the recreational fisher is only allowed to haul 2 traps per person a day and maximum of 4 traps with 2 licensed trap fishers aboard. The photo is of a recreational lightweight tipper the principle is the same a commercial one would be more sturdy with a stainless roller instead off the blue one shown for example.

I used to work as a consultant in the lobster industry and the 'pot tipper' is used exclusively here- no boom style pot haulers. We have 600 professional lobster boats on our west coast with an export industry worth anywhere between $300 and $600 million per annum - one of the biggest single species export earners in the world alongside your Alaska King crabs of course.

I just offer it up as a potential new idea for the members - no doubt you guys could soon fab up one of these and give it a workout.

Cheers
User avatar
21ftcc
Donator '09
Posts: 854
Joined: Thu Sep 04, 2008 4:19 pm
15
Your location: Worcester, MA

Re: Stuff I've been working on.

#48

Post by 21ftcc »

Since most lobster fishermen don't do pot for buoy but strings of pots with buoys at each end its easier to haul gear from a davit and a hydrologic hauler. Setting gear back is easier to where you can stack gear and let it fall off the back. Just make sure you don't stack the gear wrong or stand in the bite.
Hauling Gear
http://www.youtube.com/watch?v=BfaTqie71PY
Setting Back
http://www.youtube.com/watch?v=VTydOqSJcDc

Only recreational lobster fishermen use pot for buoy and normally hand haul gear.
http://www.youtube.com/watch?v=JnAUleNB ... re=related
Image
MacCTD
Posts: 569
Joined: Tue Jul 22, 2008 2:53 pm
15
Location: MA

Re: Stuff I've been working on.

#49

Post by MacCTD »

Looks great, nice work. :thumbsup:

I was referring to the davit you made, realized after I posted that was a little while ago.
'05 Pacific 1925
Mercury 150
User avatar
aluminumdreamer
Donator '10
Posts: 369
Joined: Sat Apr 25, 2009 8:45 pm
15
Your location: Mid Coast Maine

Re: Stuff I've been working on.

#50

Post by aluminumdreamer »

This is a single leaning post that I am building for a Chatham commercial striper guy. It is not finished I still have to add some gussets to the deck plate and under the seat. The seat is just sitting on there for the picture. I am not very happy with the side opening on the seat. I think it looks pretty crappy! There was a misunderstanding between me and the guy I am building it for. Hopefully I don't have to rebuild the seat :banghead: .

I will also be cutting, drilling, and threading a 1/2" plate that will be permanently mounted to the deck of the boat to make this unit removable. The guy I am building it for uses his boat for many different types of fishing. (Not an alloy boat)

I never really like the looks of this style of leaning post, but I guess it is growing on me. I am just trying to get more welding experience under my belt. Hopefully I'll be welding on my own craft soon :banghead: :deadhorse: :banghead: :deadhorse: .

Any feedback you guys have would be appreciated.

Thanks,

Nate
Attachments
post2.jpg
post2.jpg (50.91 KiB) Viewed 14362 times
post3.jpg
post3.jpg (47.67 KiB) Viewed 14362 times
post4.jpg
post4.jpg (46.04 KiB) Viewed 14362 times
post5.jpg
post5.jpg (46.79 KiB) Viewed 14362 times
Post Reply Previous topicNext topic